UPCOMING WORKSHOPS - 21st February and 22nd February

MORNING WORKSHOP: Springtime Beauties Cards.
DATE: 21st February 2014.
TIME: 10:00am - 12.00pm.
VENUE: Forbes Handicraft Centre, Forbes.
COST: $30 per person.

In this workshop, you will create 3 beautiful Springtime cards with sponged backgrounds, Distress Paint stamping and using Alcohol Ink Art Markers for colouring embellishments.

This workshop is suitable for beginners.

This workshop is limited to 6 people. Please RSVP to 0427 511 683.

This workshop was designed by Beryl McLean.

AFTERNOON WORKSHOP: Adore Bling 12 x 12 Layout.
DATE: 21st February 2014.
TIME: 1:00pm - 3:00pm.
VENUE: Forbes Handicraft Centre, Forbes.
COST: $45 per person.

In this workshop, you will create, a double page layout with a fold out booklet. You will also learn how to use design adhesives and foils, create altered flowers and use bling alphabet for the title.

This workshop is suitable for beyond beginners.

This workshop is limited to 6 people. Please RSVP to 0427 511 683.

This workshop was designed by Sonya Edwards.

My Workshop Rewards for You.

My Workshop Rewards for You.

KASZAZZ CREATIVE CLUB

* Join the Kaszazz Creative Club (KCC) and go into the draw to win prizes, receive voucher FREEbies and much more!

* Provided you are new to the Kaszazz Creative Club, Kaszazz will send you a FREE "Spend $20, Choose $20" Kaszazz voucher right away!


PAPERCRAFT SERVICES

I can offer the following papercraft services to you:

Invitations for all occasions.

Scrapbooking Workshops for Beginners or Beyond Beginners.

Card Making Workshops for Beginners or Beyond Beginners.

Master classes for those wanting to learn more involved techniques.

Fundraising.

Completing Scrapbooking Albums of your Precious Memories.

Please contact me on 0427 511 683 or my email:
fionadunnkaszazz@gmail.com

Yours in Kaszazz,
Fiona.


Thursday, September 27, 2012

CYBER CROP NUMBER 3


Hi Everyone,

I took part in another "Cyber Crop" on the 21st September and at least I was organised for this one. We had to have four photos which could be trimmed down. A big Thank You to Leeann Koesters for organising it.

I will list the instructions like before:

***INSTRUCTION NO: 1***
Start by choosing an SB Essential colour for your base page. Once you have decided on this take a piece of your patterned paper and cut it into a 4” strip that runs vertically. You will have a piece measuring 4” across by 12” long. Lay this over the left hand side of your chosen SB paper with the papers lining up on the left hand edge. (NO STICKING DOWN YET!!)

***INSTRUCTION NO: 2***
Choose a 2nd SB Essential paper to create a piece measuring 9” wide by 7” long. Place this aside while you choose a contrasting pattern to create a vertical strip that is 1.5” wide x 12” long, lay this over the join of the pattern and plain papers created in the first instruction. You should have a page with 3 vertical pieces. Now the piece of SB essentials that you placed to the side can be placed over the vertical pieces approximately 1” up from the bottom and 1.5” in from the right hand side. This will add some horizontal balance to the page. (Sticking down at this point is a good idea or use repositionable tape)

***INSTRUCTION NO: 3***
Crop your photos into 4 (3”x 3”) squares.

***INSTRUCTION NO: 4***
Create 2 more vertical strips in contrasting patterns of paper, ribbon, tape, rubon, stamping etc. The first needs to measure ½” wide by 6” long. The second should measure 1” wide by 8” long. The first shorter strip will be placed against the left edge of the 9” x 7”piece aligned with the bottom corner. The second strip will lay over this join with an equal amount hanging over the top and bottom edges of the 7” piece. (Don’t stick this last strip down yet.)

***INSTRUCTION NO: 5***
Create a square out of your photos, edge to edge as a block of four. Then line these up so the left edges of the two left hand squares are just under the last vertical strip that we didn’t stick down yet. There should be an even space top and bottom with the 9” x 7” piece as the background for the pictures. Now the last vertical strip can be stuck down if you are happy with the placement.

***INSTRUCTION NO: 6***
Create a title to go above the 9” x 7” piece and the start of your word lining up with the approximate centre of the photo square

***INSTRUCTION NO: 7***
Add an embellishment at the top left hand corner of the 9” x 7” piece at the top of the vertical strip. This should be a larger embellishment as it will balance out in the next step.

***INSTRUCTION NO: 8***
Add another embellishment diagonally opposite on the right hand corner of the photo block. A larger embellishment or cluster of embellishments would be great, perhaps even a stamped image. Highlight this embellishment by placing a sprinkling of little embellishments, bling etc. directly below the embellishment as though it is underlining it.

***FINAL INSTRUCTION***
If you are going to add journaling above this final embellishment to the right of the photos is the perfect location xxx

Here is a picture of the page map that we used:


 The source layout came from www.pagemaps.com

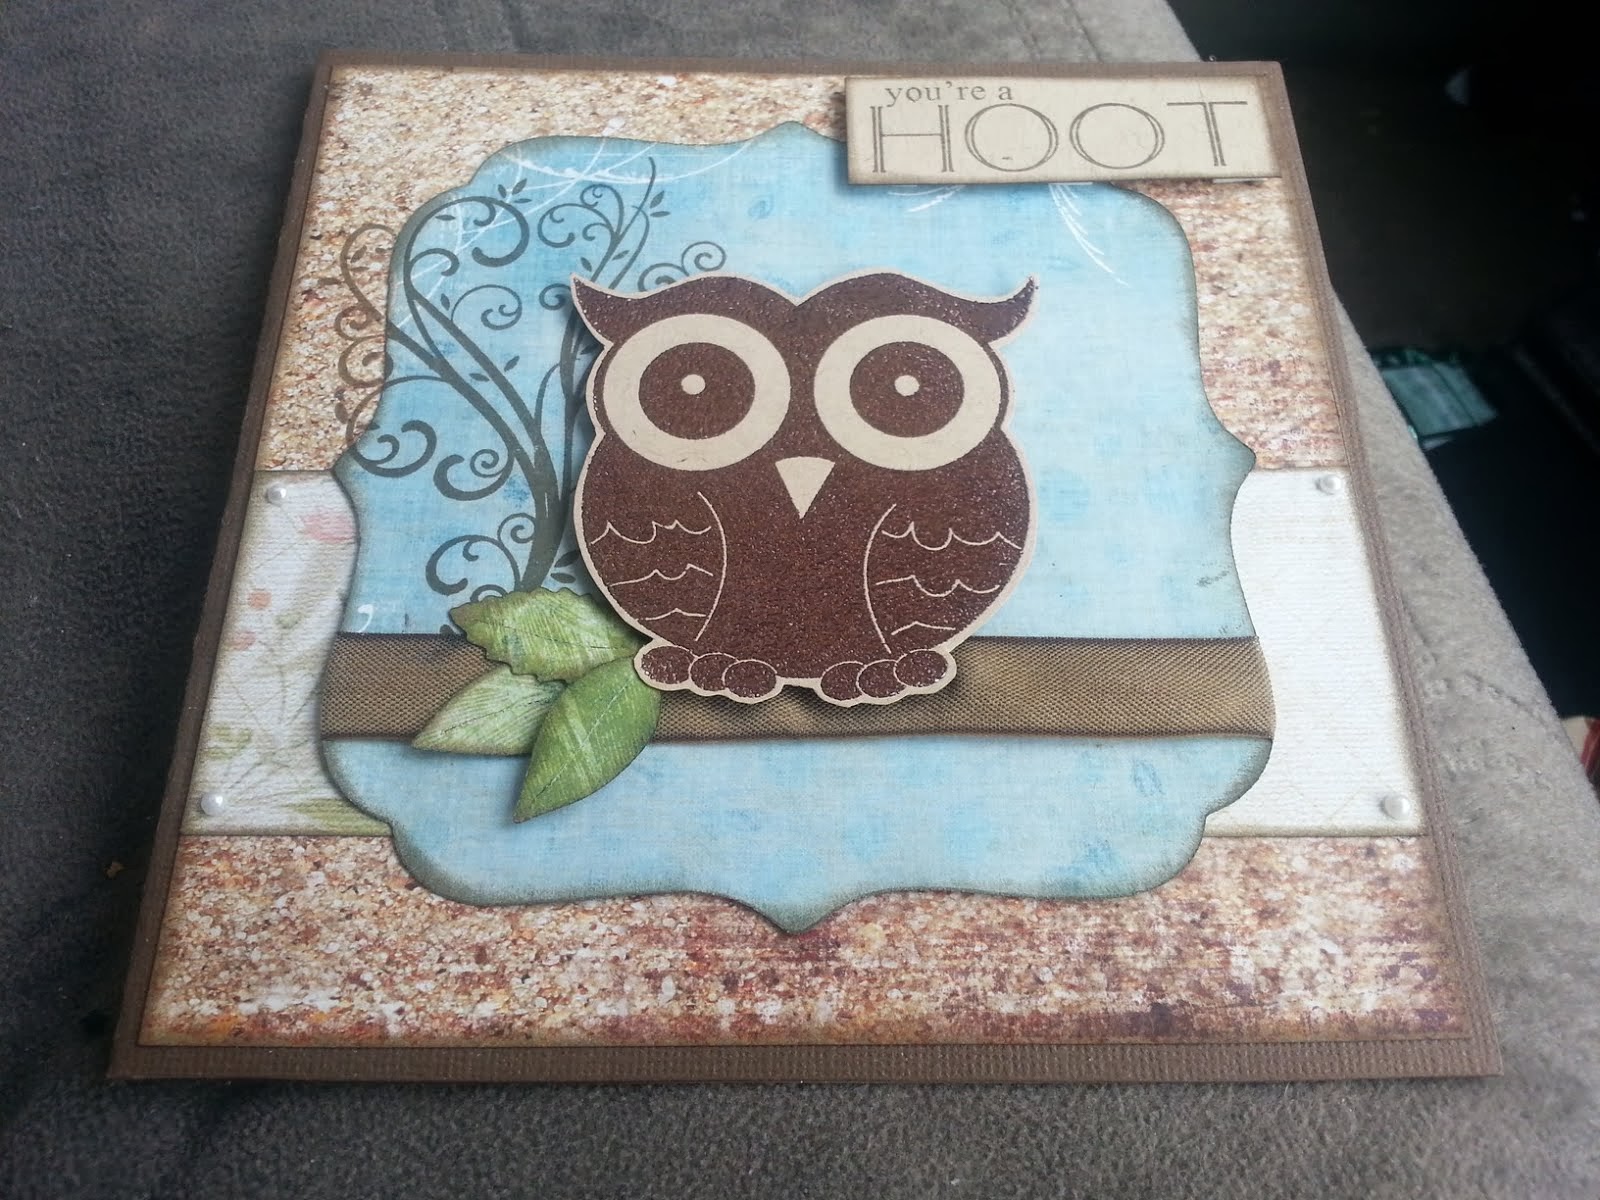
I decided to use photos of myself as I rarely scrap photos of myself.

So, here is my interpretation of the instructions:


The black butterfly is stamped on plastic sheet with Stazon Ink and it is attached to the page using Magic Mount. I was really pleased with the way that it turned out.
 
 
Yours in Kaszazz, Fiona.

Monday, September 17, 2012

CATCHING UP


Hi Everyone,

I would love you all to welcome my newest recruit, Kerrie Light. Kerrie is from Parkes, NSW and is very talented in both scrapbooking and cardmaking. She won first and second prize at the Parkes Show in her scrapbooking. Kerrie will be a real asset to my Kaszazz team. She is just so creative. I have an "inky date" with Kerrie this Wednesday, where I will be demonstrating the Tim Holtz tag techniques. I can't wait, I love anything to do with Tim.

I really have to get my craft rooms done today. I showed Kerrie my craft rooms and she said, "You can't be creative and neat!". I still haven't finished off the layouts that I started at the Cyber Crop on the 25th August. However, on the flip side, I have spring cleaned my bedroom, the hallway and the kitchen.

Here is the photo of my craft rooms. It certainly is a huge mess but one that hopefully by the end of the day, will be organised into a working space. Wish me luck.


Hopefully, this afternoon, I will have these two rooms organised. I must resist the urge to go through my stamps. I must stay on track to get this done.

Yours in Kaszazz, Fiona.

Sunday, September 9, 2012

CYBER CROP NUMBER 2


Hi Everyone,

I took part in another "Cyber Crop" on the 25th August and it was so much fun. We had lots of laughs. I decided to do 2 pages, one on Alice and the other on Brian.

I will list the instructions like before:

***INSTRUCTION NO: 1***
Select an SB essentials colour for your base page. This is a 1 page 12x12 layout. Choose a coordinating pattern paper/stamp or rubons to measure 2" x 12" this piece will run vertically down the left hand side of the base page. It lies over the base page at the left hand edge.

***INSTRUCTION NO: 2***
Select a complimentary pattern paper and trim to measure 3" x 11" this piece will also run vertically down the page approximately 1" in from the left of the page and with half an inch gap top and bottom (i.e. positioned centrally 1" in from the left, layered over the first patterned piece).

***INSTRUCTION NO: 3***
If you haven't done so already cut down your photos with two that measure 3.25" x 4.25" and one to measure 3" x 3.5" arrange these on your page overlapping the 2nd patterned paper and each other. You may like to have these offset at slight angles to each other. The 3" x 3.5" photo should be in the middle. This should spread across to the right hand side of your page. This does not go right across to the left of the page.

***INSTRUCTION NO: 4***
Using ribbon/twine/rubons or a strip of paper run a strip over the patterned pieces approximately 1 1/2" in from the left hand side. This will be an embellishment over the top of the papers and running down the full length of the page. The width of this is up to you.

***INSTRUCTION NO: 5***
Decide on your title...will it be chipboard, stamps, stickers or doodling? Also select an embellishment i.e. a circle or stamped image to sit behind your title. Layer these over each other below the photos; aim for the embellishment to be centred over the right edge of the pattern paper (the join between the pattern and SB papers).

***INSTRUCTION NO: 6***
Add an embellishment over your photos near the join of the middle and far right pictures. You may like to highlight the central photo with bling or doodling etc.

***INSTRUCTION NO: 7***
Add journaling to the right of your title. Use this blank space to tell the story of your pictures.

***INSTRUCTION NO: 8***
Add doodling around your photos to define them and edge your page if you like to with ink or doodles.

***FINAL INSTRUCTION***
Well done! Your page is now finished.

Here is a picture of the page map that we used:


The source layout came from www.pagemaps.com

Cheers, Fiona.

2H TIMELESS PAGE & POCKETS SCRAPBOOKING


Hi Everyone,

I will be holding a 2 Hour Workshop on the 11th September at 10am. It is the Timeless Page and Pockets Scrapbooking.

You will need one 5" x 7" portrait photo and four 1 3/4" x 2 3/4" portrait photos.

You will learn the following techniques:

* PAPER TEARING

* MOUNTING YOUR PHOTOS

* STAMPING

* USING THE INK BLENDING TOOL

Cost of this workshop is $25.

Please confirm your place by phoning me on 0427 511 683.

Hope to see you at my house (17 Barton Street, Forbes) for the workshop.

Yours in Kaszazz, Fiona.


Friday, August 24, 2012

"SOMETHING A LITTLE EXTRA ON TUESDAY" # 2


Hi Everyone,

That last week certainly flew by. So quickly in fact, that I am late with the "Something Extra on Tuesday".

I was making a card on Wednesday that involved embossing. I was using Perfect Medium and our gorgeous "Big Al" stamp.  I must say, I have fallen in love with owls in my cardmaking. Anyway, I had a slight mishap. I didn't press down hard enough on the stamp and the solid part of the owl only stamped out partially. I continued with the embossing. Then a brainwave hit me, not too many of those happen!

I used our "Perfect Medium Bullet Tip Pen" to go over the areas that missed the original stamping and then embossed the image again. And the image was perfect.

Our Perfect Medium Pens come in a pack of two. One has a bullet tip and the other has a brush end.

Here is the finished card.


I am thinking of designing another two cards and maybe submitting it to Kaszazz as a workshop.

Yours in papercrafting, Fiona.

Tuesday, August 14, 2012

"SOMETHING A LITTLE EXTRA" ON TUESDAY


Hi Everyone,

I know it has been a while since I have posted. My anxiety/depression has been acting up and my old medication had to be changed as my body had got used to it. Boy oh boy, now wasn't that an experience.

Anyway, I am getting back on track and that is the main thing.

I am starting a "Something a Little Extra" post each Tuesday. You should find it interesting.

*Adding Dimension to your Layouts: Try dabbing one edge of your ribbon or lace in ink, or in Tim Holtz Distress Stain.

*Creating Flower Petals from Ribbon: Cut 3 x 12cm lengths of ribbon (for smaller flowers) and 3 x 16cm lengths of ribbon (for larger flowers) and loop into a figure eight. Lay these on top of each other and secure with glossy accents.

*Gathered Flower: Do a running stitch down the middle of your ribbon. Gather this thread to create a gathered embellishment. Shape into a circle to form a flower.

*Creating Leaves: You can use our Twine - Waxed, or Twine - Paper Twist by tying it into bows and secure then to your layout using Glossy Accents.

These ideas were taken from "Australian Scrapbooking Memories" - Volume 13 No 2.

Yours in Kaszazz,

Fiona.

Wednesday, August 1, 2012

WORKSHOP TIMETABLE FOR AUGUST

Hi Everyone,

I have published my workshop timetable for August. It is on the left hand side of my blog.

Yours in papercrafting,

Fiona.

Saturday, July 28, 2012

CHALLENGES I AM TAKING PART IN


Hi Everyone,

Last night, I have joined on this website: www.scrapboutique.com.au to take part in 3 different challenges.

I have to have the challenges done by Thursday at midnight.

I will post photos when I have completed them.

Till then,

Fiona.


CYBER CROP


Hi Everyone,

I took part in a "Cyber Crop" last night with the Kaszazz consultant group. It was loads of fun.

A Cyber Crop is where the host uploads instructions every 15 minutes and goes for 2 hours. So you have no idea what the scrapbooking page will look like when it is finished. It is quite exciting when everybody uploads their pages to the site and see how everyone has interpreted the instructions.

The instructions were:

***INSTRUCTION NO: 1 ***
Start by choosing an SB Essential colour for your base page. Once you have decided on this take a piece of your patterned paper and cut it in half vertically. You will have a piece measuring 6” across by 12” long. Lay this in the centre of your chosen SB paper with 3” either side. (NO STICKING DOWN YET!!)


***INSTRUCTION NO: 2***
Choose a 2nd patterned paper to create a horizontal strip measuring 12” wide by 3” long. Along the bottom edge of this piece create a pattern by using a scallop punch, ezypress die, distressing etc.. Lay this piece across your page approximately 3” up from the bottom of the page.


***INSTRUCTION NO: 3***
Choose a contrasting patterned paper (or stamped/embossed essentials) and cut a long strip measuring 2” wide by 12” long. This will lay over the first two patterned papers slightly off centre (to the right)
This runs down the page vertically. I am still just laying all mine down to stick later.

***INSTRUCTION NO: 4***
Mat your 6x4 portrait photo with a contrasting essential colour and come up with a creative idea for a mat behind the 2.5”x3.5” portrait photo, you might use an ezypress die, stamped image or torn piece.

***INSTRUCTION NO: 5***
Create a journaling block that measures 3” across and is at least 4” long, can be longer if it suits your page. Layer your matted photos and journaling block in the following order: journaling block 2” down from top of page and laying over the 2” vertical patterned piece; then the 6x4 photo 2” up from the bottom of the page and slightly to the left of the centre panel; finally the creatively matted small photo overlapping the top left corner of the larger photo to the left top of the page. (Only sticking down if you are 100% sure you want to, repositionable tape is great at these times)


***INSTRUCTION NO: 6***
Create a title to go over the top right corner of the large portrait photo, this will also cover the bottom of the journaling block heading to the right of the page. (It should be looking balanced by now xxx)

***INSTRUCTION NO: 7***
Add embellishments where it suits your page and edge anything with inks or distressing tool to suit and don't forget to BREATHE

***INSTRUCTION NO: 8 ***
Stick everything down and do your journaling, doodle to your heart’s content

***FINAL INSTRUCTION***
Well done!!

Here is my interpretation of the instructions:


Here is a picture of the page map we used:


The source layout came from www.pagemaps.com

Cheers, Fiona

Thursday, July 12, 2012

ALICE'S NEW LOOK


Hi Everyone,

 Well, it is about time that I uploaded that photo of my daughter with her new look. Alice had a fantastic time at the hairdressers and could not keep the smile off her face.


I can't wait to complete a layout of this "special" time in Alice's life. She is still smiling.

Till next time,

Fiona.

Sunday, July 8, 2012

PHOTOS OF KIDS CARDMAKING WORKSHOP IN PARKES

Hi Everyone,

Better late than never. Please enjoy the photos of the 6 different cards I designed for the kids workshop. I demonstrated each card and then the kids had their turn. I had 26 children aged between 5 and 12 years of each. I used the Rollagraph, cling wrap, paint splatter and I can tell you that the paint splatter and the cling wrap cards were the biggest hit, with both the boys and the girls.

Rollagraph with chalking, stamping and ice stickles.

Cling wrap technique with stamping (boy design).

Cling wrap technique with stamping (girl design).

Rollagraph with stamping, chalking, and ice stickles.

Magic mounted flower card.

Paint splatter with stamping.

Thanks for visiting and I hope that you leave a comment,
Fiona.

Friday, July 6, 2012

I'M BACK

Hi Everyone,

I know it has been a while but have been busy at work. I was invited to do a cardmaking workshop at the Parkes PCYC with 26 children aged between 5 to 12 years old. I must say that they were very impressed with the splatter technique and the cling wrap technique the most. Next week, I will be going back to do a scrapbooking layout.

With the cardmaking workshop, the children made 5 cards and they were all very well behaved.

My daughter Aice, is having her very first foils in her hair today, so will upload photos of the cards when we get back home.

Hope everyone is enjoying their day,

Fiona.

Friday, June 29, 2012

TIM HOLTZ TAGS

Hi Everyone,

Well now that everyone has had the opportunity of attending the Tim Holtz workshop, I thought I would share a photo of Tim's original tags. It was an amazing experience and one that I will treasure forever.


I think over the weekend, I will take photos of my tags and post them onto my blog. I just love the Distress range and the effects that can be produced.

Yours in papercraft,

Fiona.

Monday, June 25, 2012

2ND PAGE FOR CYBER CROP

Hi Everyone,

Well, here is the second page I have completed from the Cyber Crop last night. Hope you like it.


The two pages just look so nice with each other and my daughter loves the layout. Thank heavens!

Thanks for visiting,

Fiona.


Sunday, June 24, 2012

CYBER CROP CHALLENGE


Hi Everyone,

Well, last night was exciting for me. I took part in a "Cyber Crop" organised by Leeann Koesters, a fellow Kaszazz consultant. It was scrapping blindly with no picture or photo of the finished page. It was so much fun.

Leeann sent instructions every 15 minutes and it was interesting not having a visual prompt. I will definitely be doing this again.

Here is a photo of the finished page. I am really happy with page and will be completing a second page to make it into a layout.


The papers I used are from our "Asian" range.

The stamped flower image is our "Magnolia". I stamped it directly onto the cardstock and then stamped it again on a second sheet and cut the flower out (not including the leaves) and mounted that over the other image.

This is the first time, I have used one of our "Crochet Flowers - Ivory" and I love it. I have used an "Antique Gem - Pearl" in the centre of the flower. I also used one of the "Ribbon Pack (10) Lace - Ivory" on this page and threaded our organdy ribbon through it.


If anyone is interested in taking part in a "Cyber Crop", I would be more than happy to organise one. Just let me know on 0427 511 683 or email: fionadunnkaszazz@gmail.com

Thanks for visiting,

Fiona.

Saturday, June 23, 2012

MOTHER / DAUGHTER SCRAPBOOKING CLASS


Hi Everyone,

I am thinking of starting a once a month Mother / Daughter scrapbooking workshop. It would be a 2 Hour Workshop where everything is included and you leave with an exciting finished project.

Would you please let me know if anyone is interested in attending. Once I have numbers I will organise a date, time and venue.

Thanks for your interest,

Fiona.

Technique Tuesday : Week 3

Hi Everyone,

This week for Technique Tuesday, I thought I would concentrate on:

"Embossing on Vellum".

You will need:

  • Embossing Powder in your choice of colour
  • Anti-static pillow
  • Sheet of vellum
  • Heat tool
  • Stamp of your choice
  • Perfect Medium or Watermark Ink

Technique:

  • Rub the anti-static pillow over the sheet of vellum.
  • Stamp your image onto the vellum using your ink of choice.
  • While ink is still wet, sprinkle embossing powder over stamped image.
  • Pour excess embossing powder off the vellum.
  • Dry stamped image with the heat gun. Just be careful not to overheat the vellum.

I saw this technique done by Sonya Edwards and it was just gorgeous. It would be great for wedding stationary. I didn't take a photo so will have to update this post when I have time to complete a sample.

Thanks for your interest,

Fiona.

Wednesday, June 20, 2012

TIM HOLTZ WORKSHOP


Hi Everyone,

It was so exciting to participate in a workshop designed by Tim Holtz, creative designer for Ranger. He is such a lovely, down-to-earth guy, and his work is so inspiring. I was lucky enough to win the lottery to have dinner with Tim, Mario, Alain, Peter, Karen, Sonya, Jo, Cheryl and Karen, a consultant from WA. The meal was fantastic and the company was excellent.

I would like to personally thank Peter and Karen for allowing me the opportunity to attend the workshop and to enjoy the dinner with all of you. It was such an enjoyable experience and one that I will treasure for ever.


I will post photos of the workshop once all the other Kaszazz consultants have attended their workshops. You will have to keep waiting, but the waiting will be worth it.

Cheers,

Fiona.

Saturday, June 16, 2012

NOT LONG TILL TIM HOLTZ

Hi Everyone,

Yesterday was a very busy day. I had to pick my daughter, Alice up from an excursion to Lake Burrendong. Alice enjoyed her excursion and took lots of photos. I will have to get busy with the layouts.

Today, I have to complete a Masterclass so that I have a display piece for the Make n Take Demonstration I will be doing in Parkes tomorrow. It has been a while since I have done a demonstration but I will enjoy it. I can't wait to show the new catalogue and the products of course.


This is the Masterclass I will be completing today. I have a really gorgeous photo of my daughter, Alice, that would look fabulous in this layout.

Till tomorrow night,

Fiona.

Thursday, June 14, 2012

Technique Tuesday: Week 2

Hi Everyone,

Have just realised that I missed my "Technique Tuesday" on the 12th June.

I had 2 x 10 hour night shifts and I honestly overlooked it.

Anyway, better late than never.

This week: "Embossing".

You will need:
  • Anti-static pillow
  • Stamp of choice
  • Watermark Ink or Perfect Medium Ink
  • Embossing Powder
  • Cardstock
  • Heat Gun
Technique:
  • Using the anti-static pillow, wipe across the cardstock.
  • Using your preferred ink, stamp your image on to your cardstock.
  • While ink is still wet, sprinkle embossing powder over stamped image.
  • Dry stamped image with the heat gun.

This card uses another idea for embossing. Instead of stamping an image with Watermark Ink or Perfect Medium, simply apply double-sided tape to your desired area and sprinkle with embossing powder. Heat set using the heat gun.

Yours in cardmaking,

Fiona.

Wednesday, June 13, 2012

CHILDREN'S PAPERCRAFT WORKSHOPS


Hi Everyone,

Have just published the workshops I will be running for children in the July school holidays. You will find them under the page:

CHILDREN'S WORKSHOP TIMETABLE JULY 2012

Hope to see your child there. Please RSVP to Fiona on 0427 511 683 by 30th June.

Your in papercraft,

Fiona.

Monday, June 11, 2012

SCRAPBOOKING LAYOUTS COMPLETED


Hi Everyone,

Thought I would share a couple of layouts that I have completed. I am happy with the finished results.


This layout is of my eldest son, Brian, at the St John Ambulance Camp held at Lake Burrendong.


This layout is of my daughter, Alice, at the St John Ambulance camp held at Lake Burrendong.

These layouts are great to use up scrap pieces of cardstock and patterned paper. The workshop was designed by Kellie Lopaz and Michelle Dawson.

Yours in scrapbooking,

Fiona.

HAPPY LONG WEEKEND TO EVERYONE


Hi Everyone,

Happy Long Weekend to you all. Hope you have enjoyed the extra day off.

I have organised the magnets for the car doors and printed loyalty cards. I just have to wait till they arrive. I can't wait to start sharing that new Kaszazz catalogue with everyone. The new papers are just divine and I must create a project with them very soon.

I am taking part in a cyper crop on the 23rd June. Instructions are posted every 15 minutes and by the end of 2 hours, I will have completed page 1 of a 2 page layout. This sounded very exciting and so I jumped at the chance to join it. I will share photos when the cyper crop has been completed.

Till tomorrow,

Fiona.


Saturday, June 9, 2012

JULIE STORTI'S CARD


Hi Everyone,

Julie has allowed me to post a picture of her gorgeous masking tape card. Thanks for letting me share.


I love the simplicity of this card and plan to make it over the next week or so. I have an early shift tomorrow so must go to bed and get some sleep.

Till tomorrow,

Fiona.

Friday, June 8, 2012

NEW MASKING TAPE IN THE KASZAZZ RANGE


Hi Everyone,

Thought I would share a photo of the masking tape that Kaszazz now have in their range. It is great for scrapbookers and cardmakers alike. It is very easy to make up a quick card using the tape as the background embellishment. I have seen a card made by Julie Storti, a Kaszazz consultant but will ask her permission before I post a picture of the card on here. It is a gorgeous card.


Below is an example of a card using one of the new masking tapes as well as one of our lastest stamps.


Hope you enjoyed todays post,

Fiona.

Thursday, June 7, 2012

UPDATE

Hi Everyone,

Well, I didn't get the card with the distress markers started or finished today. I had to go into work on my day off. Oh well, the bank balance will be looking healthier. That is, until I place another Kaszazz order.

I have a full day off tomorrow. Tomorrow's plan is to make the 27 Artist Trading Cards (ATC's) for a swap with other Kaszazz consultants. They are so much fun to make and I love seeing other consultants designs. Each ATC measures 2.5" x 3.5" and are like miniature works of art.

I must share a card that was made in a card swap for me by Carolyn Shaw. This is a really beautiful card and I love the colour purple that she chose.


 Till tomorrow,

Fiona.

Wednesday, June 6, 2012

TIM HOLTZ COMING TO AUSTRALIA


Hi Everyone,

I was lucky enough to win a ticket to a Tim Holtz Workshop in Sydney. I am that excited and am counting down the sleeps till the workshop. It will be fantastic and I can't wait to show you all the finished project.

The date of the workshop is on the 19th June and starts at 9am.

To add to the excitement, I will be having dinner with Peter and Karen Stock, Tim Holtz and 4 other lucky Kaszazz consultants. I will be in papercrafters heaven.

Enough of my rambling. I have uploaded a photo of a boy card I made quite a while ago . I love this stamp and the papers which are exclusive to Kaszazz.


I would love to try this card again using the Tim Holtz Distress Markers. I should do that tomorrow morning. OK that is my project for tomorrow.


Yours in papercrafting,

Fiona.


Tuesday, June 5, 2012

Technique Tuesday: Week 1


Hi Everyone,

Thought I would start a "Technique Tuesday". I will discuss a different technique each week.

This week: "Watermark Stamping".

You will need:
  1. Watermark Ink or Perfect Medium
  2. Cardstock
  3. Rubber Stamp

Technique:
  1. Using your preferred ink, stamp your image onto the cardstock.
  2. Let dry naturally.
  3. Use your stamped cardstock as a base for your cards or scrapbooking layouts.


You can see the Watermark Stamped background on the above cardstock used in the layout.

Yours in scrapbooking,

Fiona


Monday, June 4, 2012

EXCITEMENT PLUS

Hi Everyone,

Well, my order arrived today with the new products. I must say Kaszazz have really outdone themselves with these new products. I can't wait to have a play with the new Distress Markers.


I have been finishing off some scrapbooking layouts of my son Brian, son James and daughter Alice. I was really happy with the finished layouts and the offspring are happy their albums are getting updated. I will have to upload photos later on tomorrow night as I have hungry mouths to feed.

I am going to be starting a card swap next month. The theme will be "Teddy Bears". The idea is to make cards for each person taking part in the swap, eg: if there are 10 people in the swap, then you make 10 cards exactly the same, and put them in an addressed envelope to me, including a self addressed stamped envelope. Please let me know if you are interested.


Yours in papercraft,

Fiona.

Sunday, June 3, 2012

THE FRAME IS NOW COMPLETE


Hi Everyone,

Well, here is the finished frame. I am quite happy with the end result. It will look lovely in my studio.


I just love using the sticky bling and the coloured rhinestones, they really bring a project to life.

The saying is:

GO CONFIDENTLY IN THE DIRECTION OF YOUR DREAMS. LIVE THE LIFE YOU'VE IMAGINED.

I think that saying was made for me.

Bye for now,

Fiona.


MY EFFORT LAST NIGHT


Hi Everyone,

I am making a chipboard frame to put a photo of my gorgeous upline, Lorraine Paton, in, so that I will see her everyday in my studio. Lorraine is such a positive person and I love her as a dear friend.

So here are my efforts so far. I still have to add a saying and more embellishments. I hope to finish this later in the day.


Yours in scrapbooking and papercrafting,
Fiona.


Saturday, June 2, 2012

GETTING ORGANISED

Hi Everyone,

I have been busy after 3.30pm coming up with a list of where I should be leaving KASZAZZ catalogues. I can't beleive how many places we came up with. I am really pumped up about this.

One thing I have been working on is a folder that includes the different Kaszazz products and how to use them with different techniques. This has been a huge help with the products and how to use them in different ways, allowing me to think outside of the square.

My very first attempt at using the Distress Stains

I think it was the "Chemistry 101" online class with Tim Holtz that has "reignited the flame" so to speak. I am so excited to be attending a Tim Holtz workshop in Sydney on the 19th June.

My upline Lorraine Paton has huge belief in me and I hope to make her so proud with my journey in KASZAZZ.

Thanks for reading my post, Fiona.

Friday, June 1, 2012

LAUNCH OF NEW KASZAZZ CATALOGUE AND PROJECT BOOK


Hi everyone,

Last month saw the launch of the latest Kaszazz catalogue and Project Book. It is absolutely amazing. The new "Botanicals" range of papers is simply the best. The stamps they designed to go with the papers you just have to see to believe.

Please contact me for your copy, (FREE when you hold a Make n Take Demonstration, or have $100 in sales).

I received the following saying on Thursday and I must say, it hit a chord within me.

YOU CAN ACCOMPLISH ANYTHING, IF YOU DO NOT ACCEPT LIMITATIONS. WHATEVER YOU MAKE UP YOUR MIND TO DO, YOU CAN DO.

I am going to make up a chipboard frame with this saying and display it in my studio. I hope the Forbes people are ready for Kaszazz.

Yours in scrapbooking and papercrafting,

Fiona.

Tuesday, January 24, 2012

First Update for 2012

Hi Everyone,

I hope you all enjoyed the Christmas break. We had a very quiet break and went on holidays to Merimbula for 10 days. The coastal weather did wonders for us all and I feel so energised.

Due to my decision to start a cattery, "Ascotdelvin British", I put my Kaszazz business on hold. Now that is underway, I am able to go back to running the Kaszazz workshops again.

Bye for now, Fiona.